All the Different Nail Shapes
All the Different Nail Shapes
So, your acrylics have seen better days. They’re grown out, maybe one has lifted, and you’re ready for a fresh start. You’re probably tempted to just… pick them off. Please don’t!
I’m here to show you how to handle your own acrylic nail removal right at home. It’s way easier than it looks, and doing it the right way means your natural nails will thank you later. Let’s get them off safely.
You can’t go into battle without your gear. Having everything laid out first makes the whole process smooth and way less messy. Trust me, you don’t want to be scrambling for a cotton ball with one hand covered in acetone-soaked foil.
Nail clippers and a coarse nail file. We need to get the length down and rough up the surface.
100% pure acetone. Check the label! Regular nail polish remover won’t be strong enough to break down the acrylic. This is non-negotiable.
Cotton balls or pads. To hold that magic acetone right on the nail.
Aluminum foil. Cut into small squares, about 3×3 inches. Big enough to wrap around your fingertip.
A wooden cuticle stick or orange stick. For gently pushing off the softened acrylic.
Petroleum jelly or a thick cuticle oil. This is your secret weapon for protecting your skin.
A nail buffer and a rich hand cream. For the finishing touches and much-needed hydration.
First things first, let’s make these nails manageable. Use the nail clippers to trim the acrylics down as short as you can without clipping your own nail. The less acrylic there is, the less you have to dissolve.
Now, grab that coarse nail file (a 100/180 grit is perfect) and start filing down the top layer of the acrylic. You want to remove the shiny top coat and thin out the acrylic itself. Don’t go crazy here — you’re not trying to file the whole thing off, just create a rough surface so the acetone can penetrate.
The goal is to take off the shine and some of the color. If you start to feel any heat or see your natural nail, stop immediately. You’ve gone far enough.
Acetone is incredibly drying. To keep your cuticles from turning into the Sahara desert, apply a generous layer of petroleum jelly or cuticle oil to the skin all around your nails. Try to avoid getting it on the acrylic itself, as it can block the acetone from working.
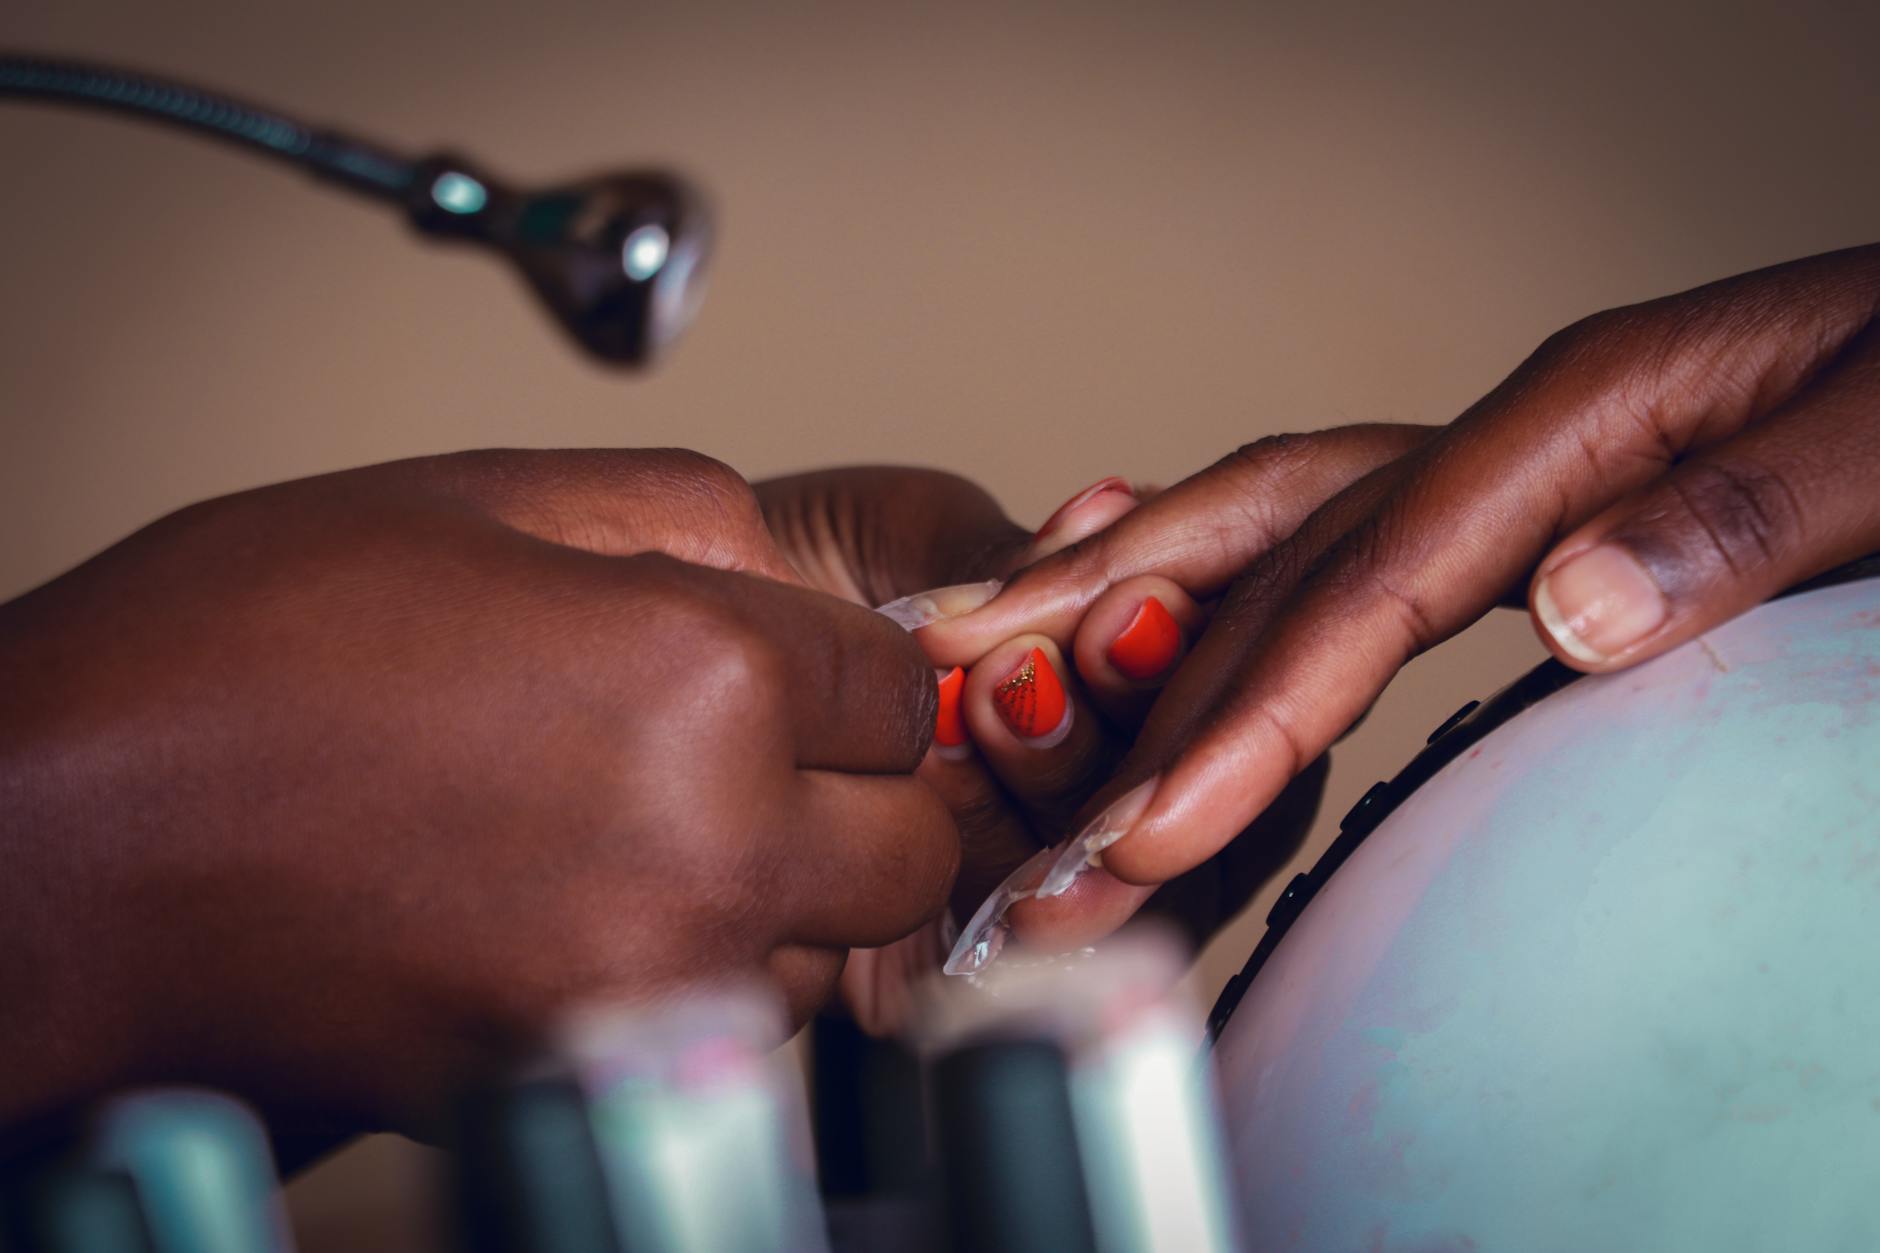
This is the best way to do your own acrylic nail removal because it traps heat, which helps the acetone work faster. Soak a piece of a cotton ball in the pure acetone, place it directly on top of your nail, and make sure it covers the entire acrylic surface.
Immediately wrap the foil square tightly around your fingertip, securing the cotton ball in place. Repeat for all ten nails. Now you look like a cool robot from a B-movie. Just hang tight for about 20-30 minutes.
After about 20 minutes, unwrap one nail. The acrylic should look gummy and soft, almost like it’s melting. If it does, you’re ready for the next step. If it still seems hard, re-wrap it and give it another 10 minutes.
Take your wooden cuticle stick and gently push the softened acrylic off your nail. Start from the cuticle area and push towards the tip. It should come off easily in layers without any forceful scraping. This is key — if you have to pry or scrape hard, it’s not ready. Just re-wrap it and wait a bit longer.
Work one nail at a time. If you unwrap them all at once, the acrylic will start to harden again before you can get to it.
Once all the acrylic is off, your natural nails might look a little rough. That’s totally normal. Use the soft side of your nail buffer to gently smooth out the nail surface.
Now for the most satisfying part. Wash your hands with a gentle soap to get rid of any dust and acetone residue. Then, slather on that cuticle oil and a thick, luxurious hand cream. Your nails and skin have been through a lot, and they are thirsty!
Ventilation is your friend! Acetone has some serious fumes, so open a window or turn on a fan. You’ll be glad you did.
Don’t be afraid to re-soak. Some acrylic is thicker than others, especially if you had a 3D design or encapsulation. Patience is way better than peeling off a layer of your natural nail along with the acrylic.
Give your nails a vacation. The best thing you can do after acrylic nail removal in 2026 is to let your natural nails breathe for a week or two. Keep them short and moisturized. They’ll grow back stronger.
See? You totally got this. You just saved yourself a trip to the salon and learned how to remove acrylic nails without wrecking your natural ones.
Now that they’re free, keep them happy and hydrated. A little TLC goes a long way, and your nails will be ready for their next adventure when you are.
All the Different Nail Shapes
Wedding Nail Designs Favorite Wedding Nails
55 Winter Nail Art Ideas
15 Best Nail Polish Organizers
Leave a Reply