Best Body Wash For Skin
Best Body Wash For Skin
Ever walked past a farmers market stall with gorgeous, handmade soaps and thought, “I could never do that”? Well, I’m here to tell you that you totally can. Soap making for beginners is way easier than it looks, especially with a simple method called “melt and pour.”
Forget the intimidating chemistry class vibes. With melt and pour, you’re just melting a pre-made base, adding your own creative flair with scents and colors, and pouring it into a mold. That’s it! It’s fun, fast, and you get to use your amazing creation almost right away.
Let’s walk through the six simple steps to making your very first batch of custom soap at home. You’ve got this.
First things first, let’s get all your gear in one place. You don’t need a professional lab, just a few key items. Most of this you probably already have in your kitchen.
You’ll need a melt-and-pour soap base, soap molds (silicone ones are great), a heat-safe container for melting (a large glass measuring cup is perfect), and something to stir with, like a silicone spatula. For the fun stuff, grab some soap-safe fragrance oils and colorants.
Before you start melting, get your station ready. I learned this the hard way after a little spill on my counter! Lay down some newspaper or a craft mat for easy cleanup.
Make sure your molds are clean and completely dry. Any little speck of dust or drop of water will show up in your final bar. Set them on a flat, level surface where they can sit undisturbed for a few hours.
Your soap base will come as a big block. The trick to getting a smooth, even melt is to chop it up into small, one-inch cubes. The smaller the pieces, the faster and more evenly they’ll melt.
Put the cubes into your glass measuring cup and pop it in the microwave. Heat it in short 30-second bursts, stirring in between each one. You want to get it *just* melted, not boiling. If it gets too hot, it can become rubbery or cloudy. Slow and steady is the way to go.
Once your soap base is a smooth liquid, it’s time to get creative. You need to work fairly quickly here because the soap will start to set as it cools. This is my favorite part!
Add a few drops of your chosen fragrance oil and your colorant. A little goes a long way, so start small. You can always add more! Stir gently until everything is evenly combined. Over-stirring can create extra bubbles, so be gentle.
This step is so satisfying. Carefully and slowly pour the liquid soap into your molds. Try to pour from a low height to minimize splashing and bubbles.
If you see some pesky bubbles on the surface, here’s a pro tip: give them a light spritz with a spray bottle filled with rubbing alcohol. It makes them vanish instantly. It’s like magic!
Now comes the hardest part: being patient. Your soap needs to cool and harden completely, which usually takes 4-6 hours at room temperature. Don’t put it in the fridge or freezer to speed it up, as this can cause condensation and a weird texture.
Once the soap is firm to the touch and completely cool, gently flex the mold to pop your bars out. Look at that—you just made soap! It’s ready to use right away.
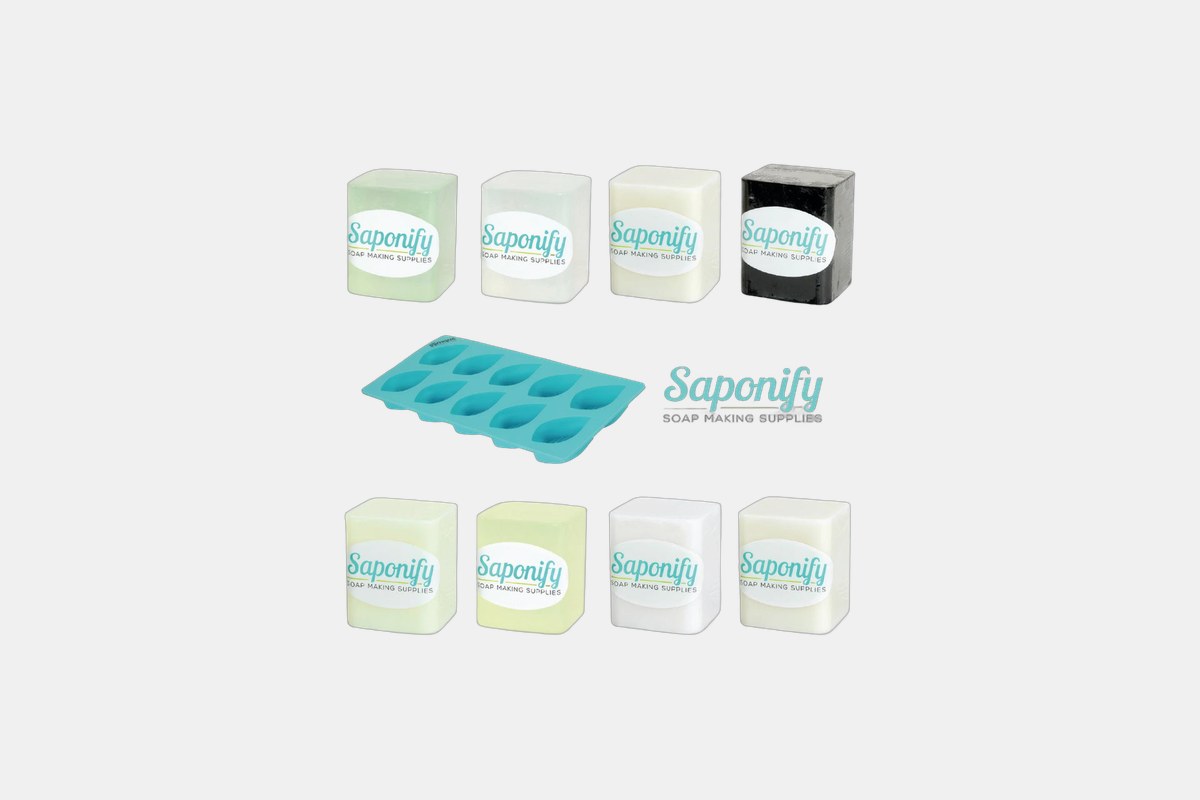
Ready to get started but not sure what to buy? A kit is the easiest way to get everything you need in one box. Here are some of the best ones we’ve found for every type of beginner.
For just $19.99, this kit is an amazing entry point into soap making.
It’s designed for total newbies and even kids, with super simple instructions and all the supplies you need to make up to 10 bars. Reviewers love it because it’s affordable and not overwhelming, making it a perfect first project.
The Downside: The supplies are only enough for a few small batches, so you’ll need to buy more base if you get hooked.
This kit costs $59.99 and is a fantastic all-in-one package.
If you want high-quality ingredients and all the tools from the start, this is a great choice. It comes with a beautiful shea butter base, molds, a measuring cup, and even dried flowers and gift labels for your finished soaps. People praise it for being a complete set that makes getting started a breeze.
The Downside: It’s one of the more expensive starter kits on the list.
At $38.99, this sampler offers incredible value for creative beginners.
This is for the person who wants to play with different soap types right away. You get seven different natural bases, including goat milk, shea butter, and honey. It’s enough to make about 28 bars, so you’ll have plenty of room to experiment as you build your skills.
The Downside: It’s just the soap bases, so you’ll have to buy your molds, scents, and tools separately.

This kit is priced at $49.95 and is perfect for trying lots of different professional-quality soaps.
With 8 pounds of different bases, you can make nearly 100 bars of soap! It’s a great option if you think you might want to make gifts or even sell your creations down the road. It also comes with a silicone mold to get you started.
The Downside: The included mold can sometimes vary depending on what the company has in stock.
This scent-focused kit costs $35.00.
If you’re excited about making beautifully scented, nourishing soap, this is the one for you. It was picked by experts for its simple instructions and premium ingredients, like a goat milk base and pure lavender essential oil. It’s a simple way to make a really high-quality product at home.
The Downside: You’re limited to the hibiscus and lavender scents included in the box.
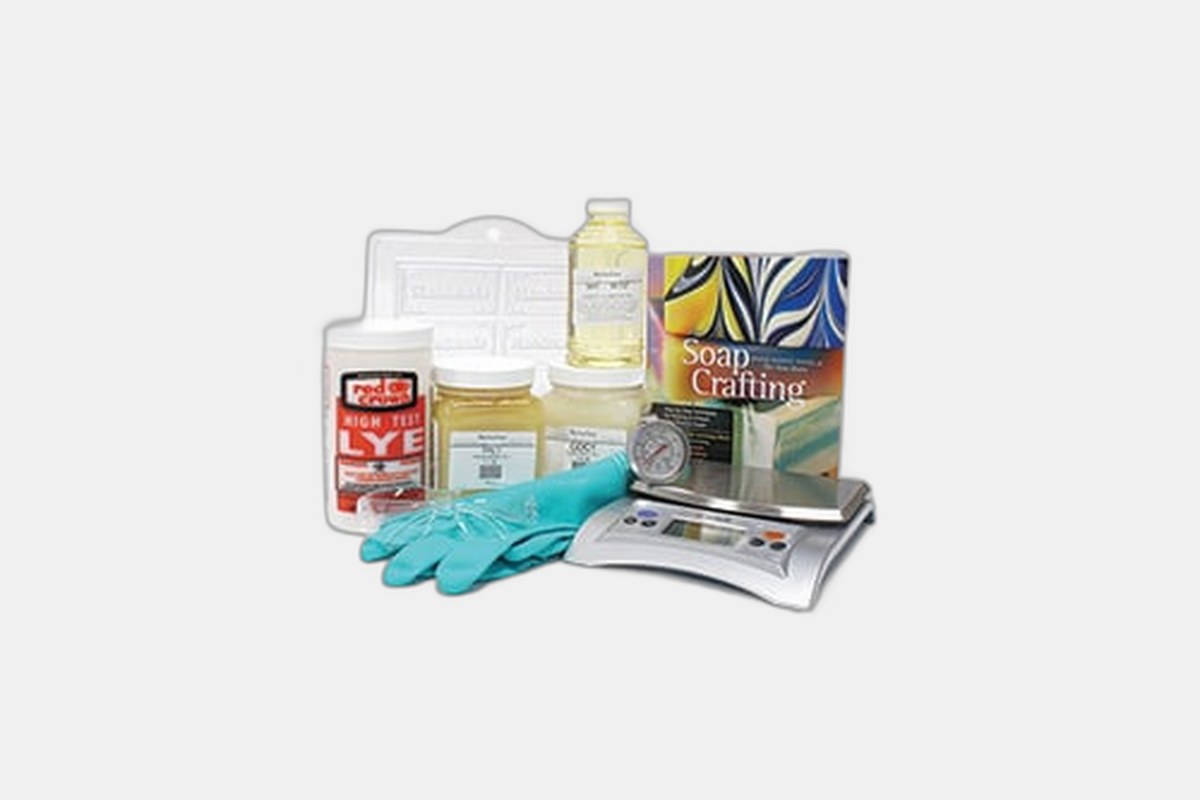
This deluxe kit is $133.89, and it’s for those who want to learn the traditional “cold process” method.
This is a step up from melt-and-pour. It includes everything you need—oils, lye, a digital scale, and a thermometer—to make soap completely from scratch. It even comes with a 239-page book full of recipes and techniques for long-term learning.
The Downside: This method requires handling lye, which is a caustic chemical that requires safety precautions. It’s also much more expensive.
See? That wasn’t so scary. You’ve officially joined the world of home soap making. Once you get the basic process down, the possibilities are endless.
Start playing around! Try adding things like oatmeal, poppy seeds for exfoliation, or dried flower petals. Mix colors and scents to create your own signature soap. Most importantly, have fun with it and be proud of what you made.
Best Body Wash For Skin
How To Get Rid of Cellulite: 13 Tips from Dermatologists
13 Best Soaps
Tattoo Aftercare 101: How to Take Care of Your New Ink

Leave a Reply