What Is Balayage Hair Color: Your Guide to Highlight Trends
What Is Balayage Hair Color: Your Guide to Highlight Trends
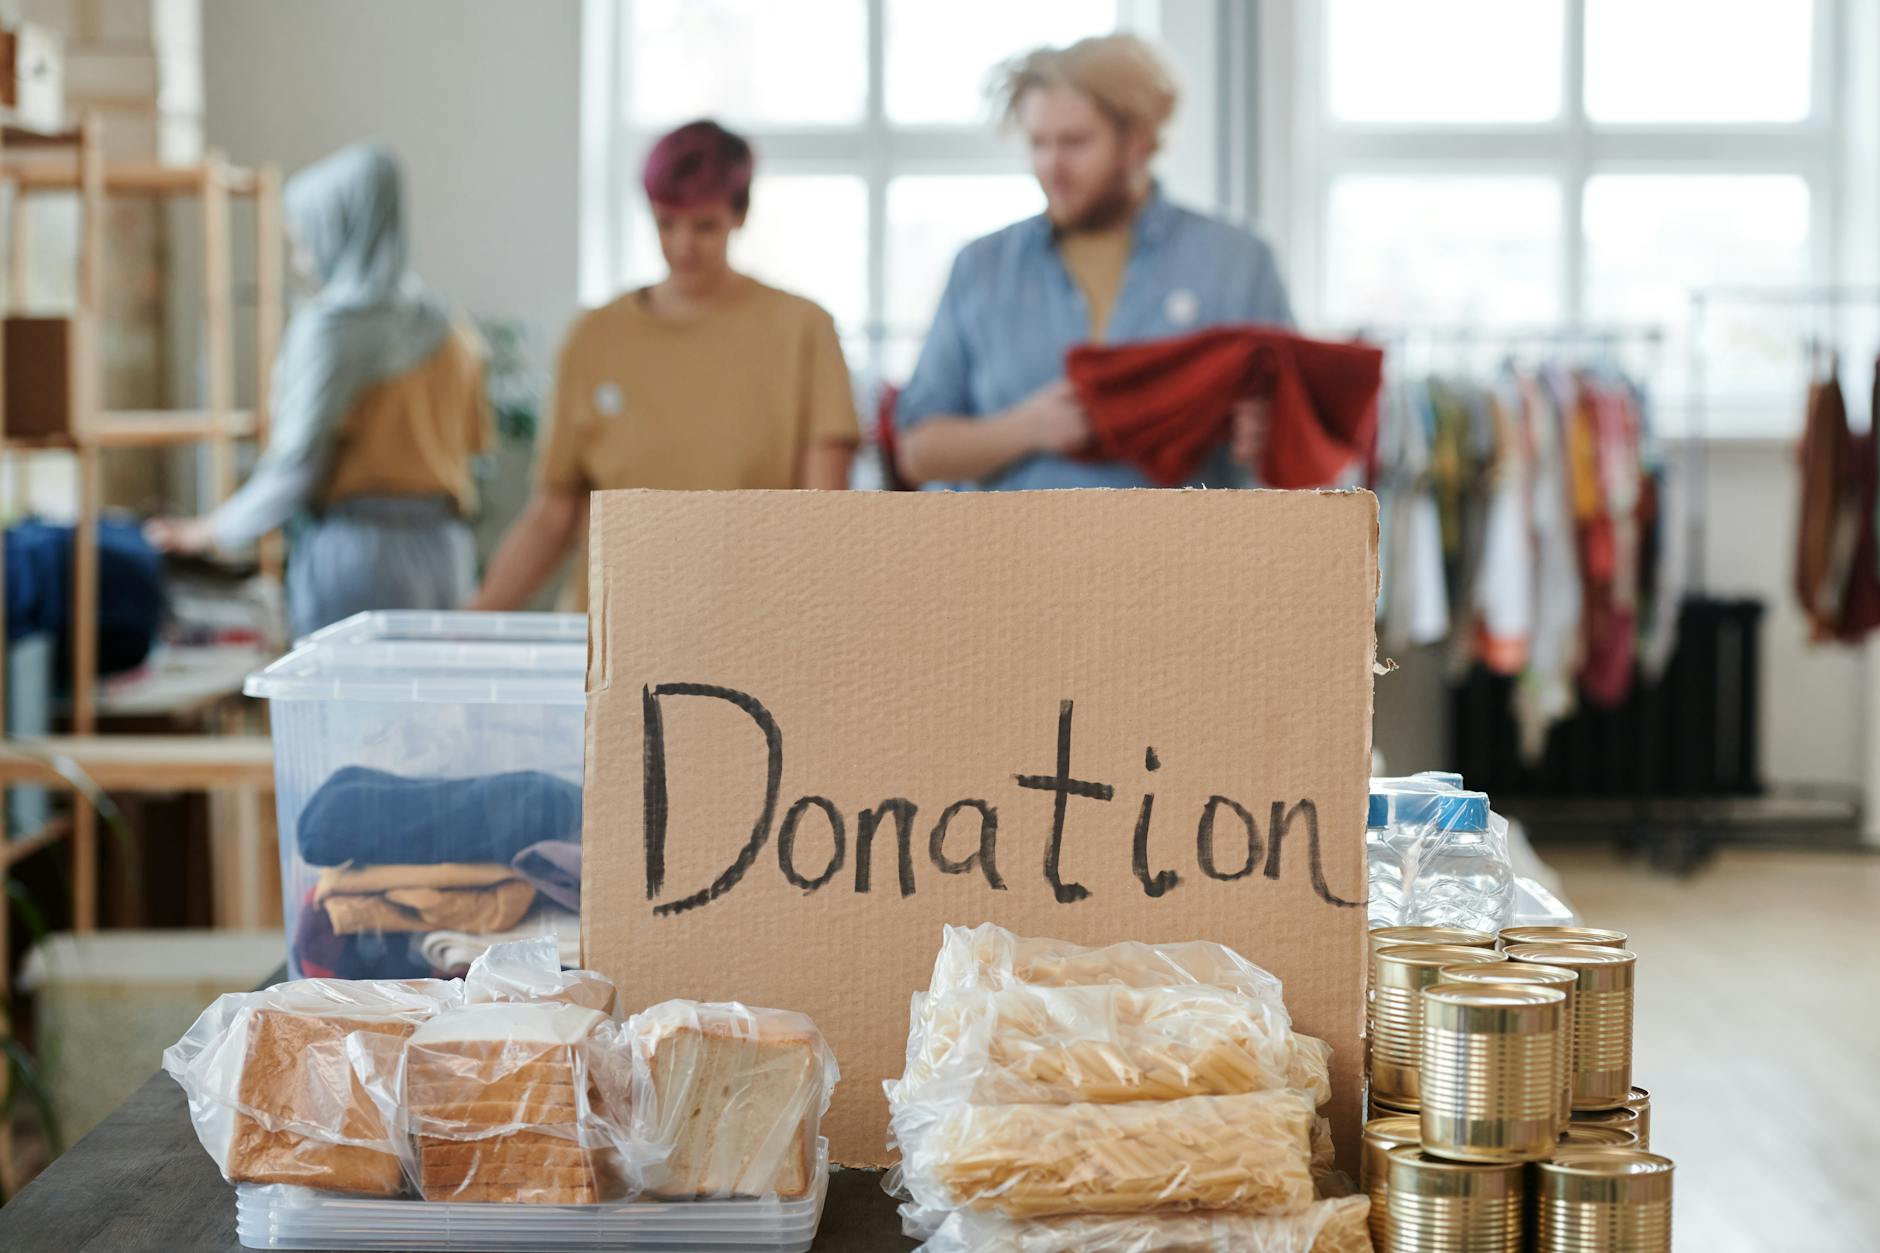
Thinking about donating your hair is awesome! It feels great, and it’s a super kind thing to do for someone else. But the whole donate hair process can feel a little confusing at first. What are the rules? Where do you even send it?
Don’t worry — it’s way easier than it looks. We’re going to walk through everything, step-by-step, from picking a charity to mailing your ponytail. You’ve got this.
Okay, this is the trick nobody tells you. Most people get their hair cut and *then* try to find a place to send it. Do it the other way around! Every organization has slightly different rules, and you don’t want to find out your 10-inch ponytail needed to be 12 inches.
A few great places to start your search are Wigs for Kids or Hair We Share. Do a quick search for their requirements for 2026, as they can change. Pick the one that feels right for you, and then you’ll know the exact rules you need to follow.
Once you’ve picked a charity, head straight to their donation guidelines page. This is non-negotiable! You’re looking for three main things.
This is the big one. Most places require a minimum of 10 to 14 inches. To measure, gather your hair into a low ponytail and measure from just above the hair elastic to the very tips. I always recommend having a little extra length, just in case.
Can you donate colored hair? Usually, yes, if it’s dyed a natural color. Can you donate bleached or heavily highlighted hair? Almost always, no. The chemical processing makes the hair too fragile for the wig-making process.
Gray hair is almost always welcome! But again, the golden rule is to check your specific charity’s website. They will tell you exactly what they can and can’t accept.
This is a huge deal. Your hair must be freshly washed and 100% dry before you cut it. Any dampness can cause it to mold in the mail, and then it can’t be used. Also, skip the styling products on cutting day — no mousse, hairspray, or serums.
It’s time! You can go to a stylist who has experience with donation cuts, or you can totally do this at home with a friend’s help. The key is how you bundle the hair.
Don’t just chop off one giant ponytail. That method actually wastes a lot of the shorter hair around the nape of your neck. Instead, section your dry hair into 4 to 6 smaller, tight ponytails around your head.
Secure each small ponytail with a hair elastic at the top (where you’ll cut) and another one near the bottom to keep the strands together. This keeps everything neat and gives the wig makers more usable hair. Then, simply cut about an inch *above* the top elastics.
You did it! The hard part is over. Now, just make sure your hair gets there safely.
Place the completely dry ponytail (or ponytails) into a sealed plastic baggie. Squeeze all the air out before you zip it shut. This protects it from the elements on its journey.
Next, check the charity’s website for their donation form. Most have a little paper you print out and fill in with your info. Tuck the form and the bagged hair into a padded or cardboard mailer envelope and send it on its way.
First, take “before and after” photos! It’s fun to see the transformation, and it’s a great way to encourage others to consider donating, too.
If you have layers, the multiple-ponytail method is your best friend. It ensures that even the shorter layered pieces are bundled correctly and can be used. Just make sure each individual ponytail meets the minimum length requirement.
Finally, double-check the mailing address right before you head to the post office. Things can change, and you want to make sure your amazing gift gets to the right place.
Seriously, that’s the whole donate hair process. You grew it, you chopped it, and you’re about to make a huge difference for someone. Go look in the mirror and admire your new haircut — you’ve earned it!
What Is Balayage Hair Color: Your Guide to Highlight Trends
10 Best Leather Conditioners
10 Best Mild Shampoos
23 Best Clarifying Shampoos


Leave a Reply